How to install Boei on your WordPress website
You can install Boei effortlessly on your WordPress site or WooCommerce store, and you won't even need a developer. It is super simple!
Just grab a cup of coffee ☕️, and you can do the installation in 5-mins yourself.
There are several methods to install Boei
- Boei WordPress Plugin (recommended)
- Header and Footer plugin
- Edit header file
Option 1 - Boei WordPress Plugin
👉 Boei plugin on WordPress.org
Step 1. Create an account
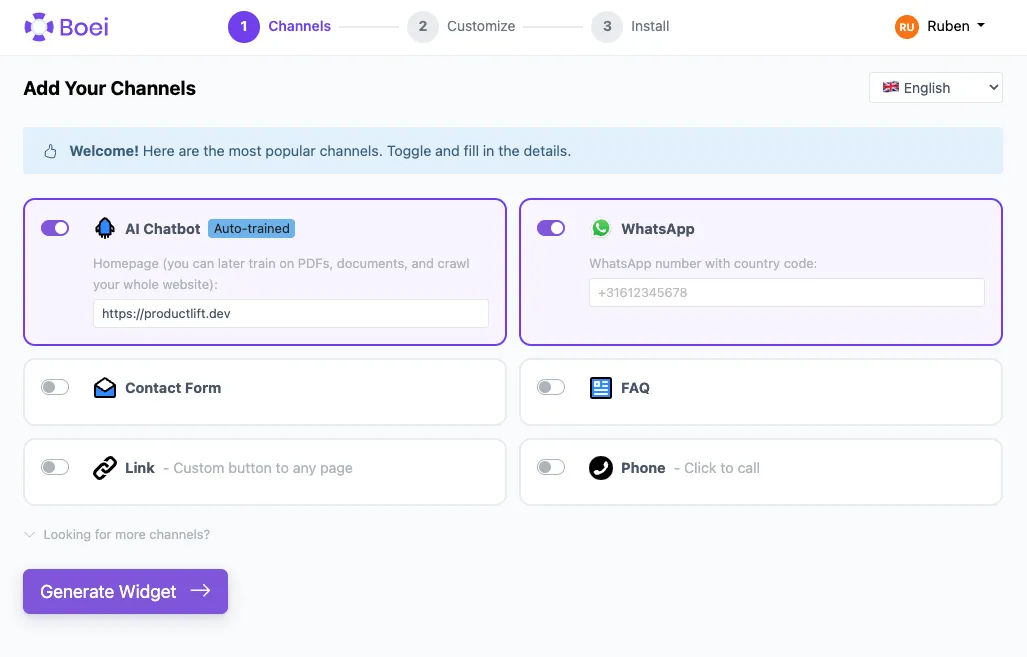
Create a Boei account if you don't have one yet. The onboarding will guide you through selecting channels, choosing a theme, and positioning your widget.
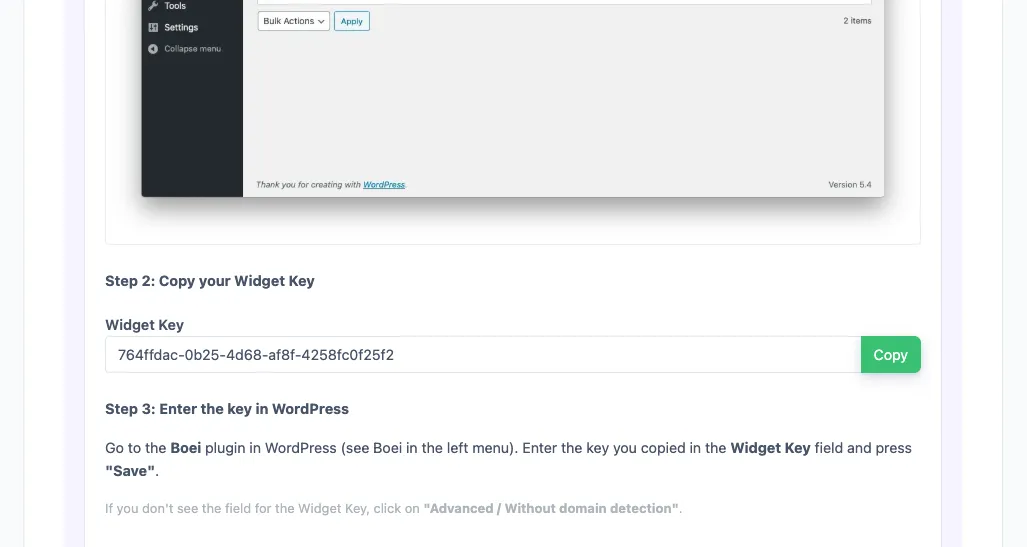
Step 2. Copy WordPress key
In your Boei dashboard, open your widget and click the Install tab. Select WordPress and copy the WordPress plugin key.
Tip: The Install tab also offers a landing page link, QR code, and iframe embed.
Step 3. Log in to WordPress
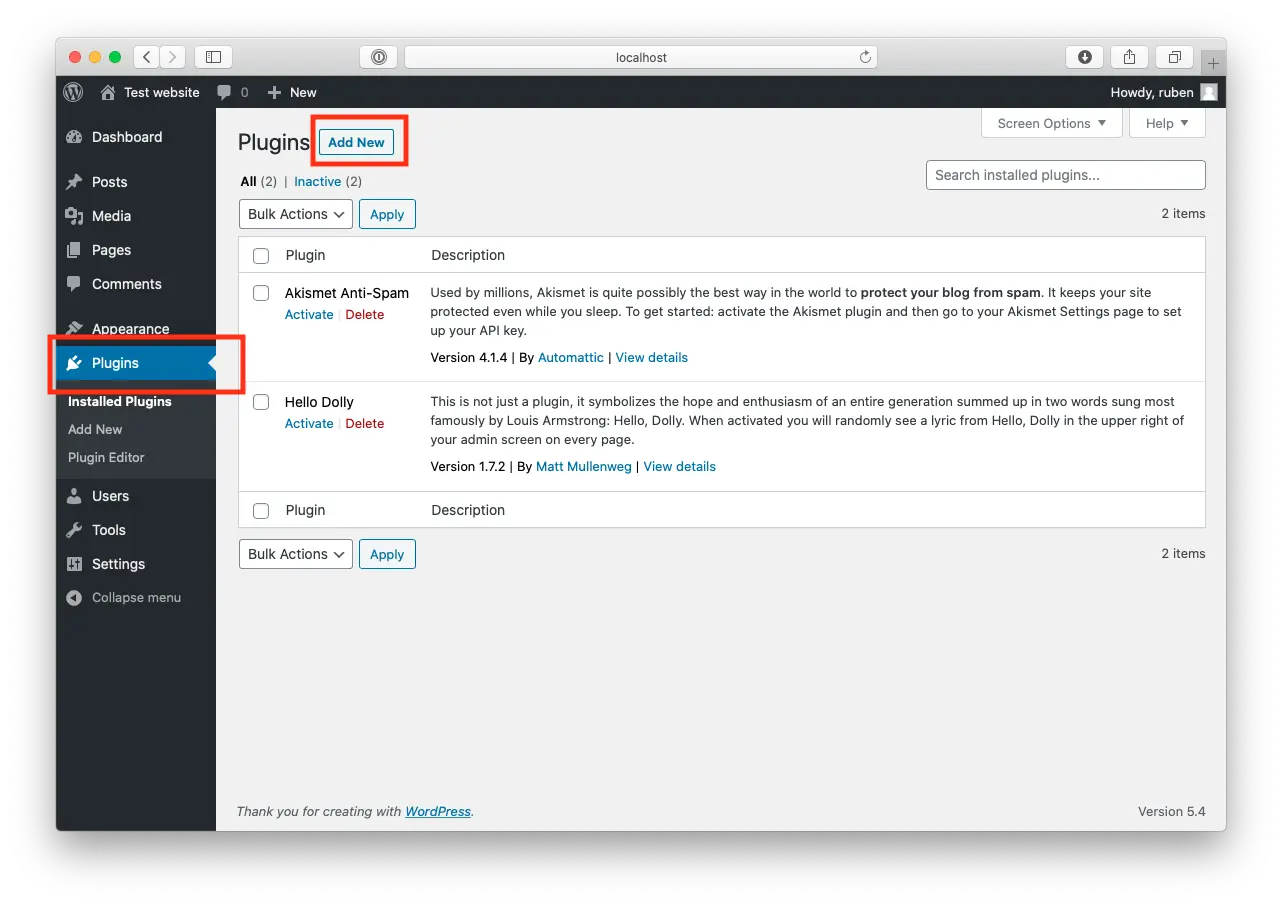
Open WordPress and click on "Plugins".
Now, click "Add New" at the top of the page.
Step 4. Install Boei Plugin
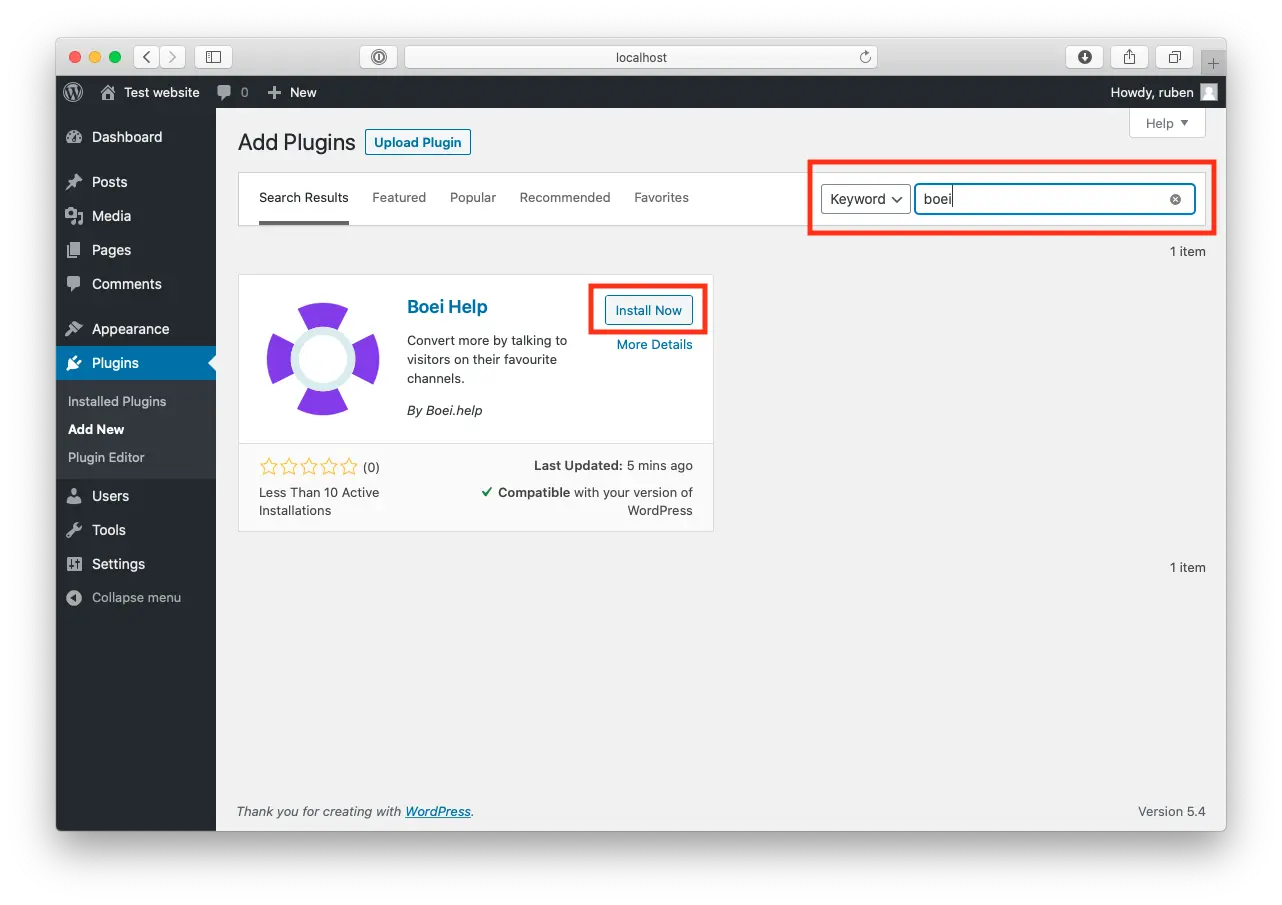
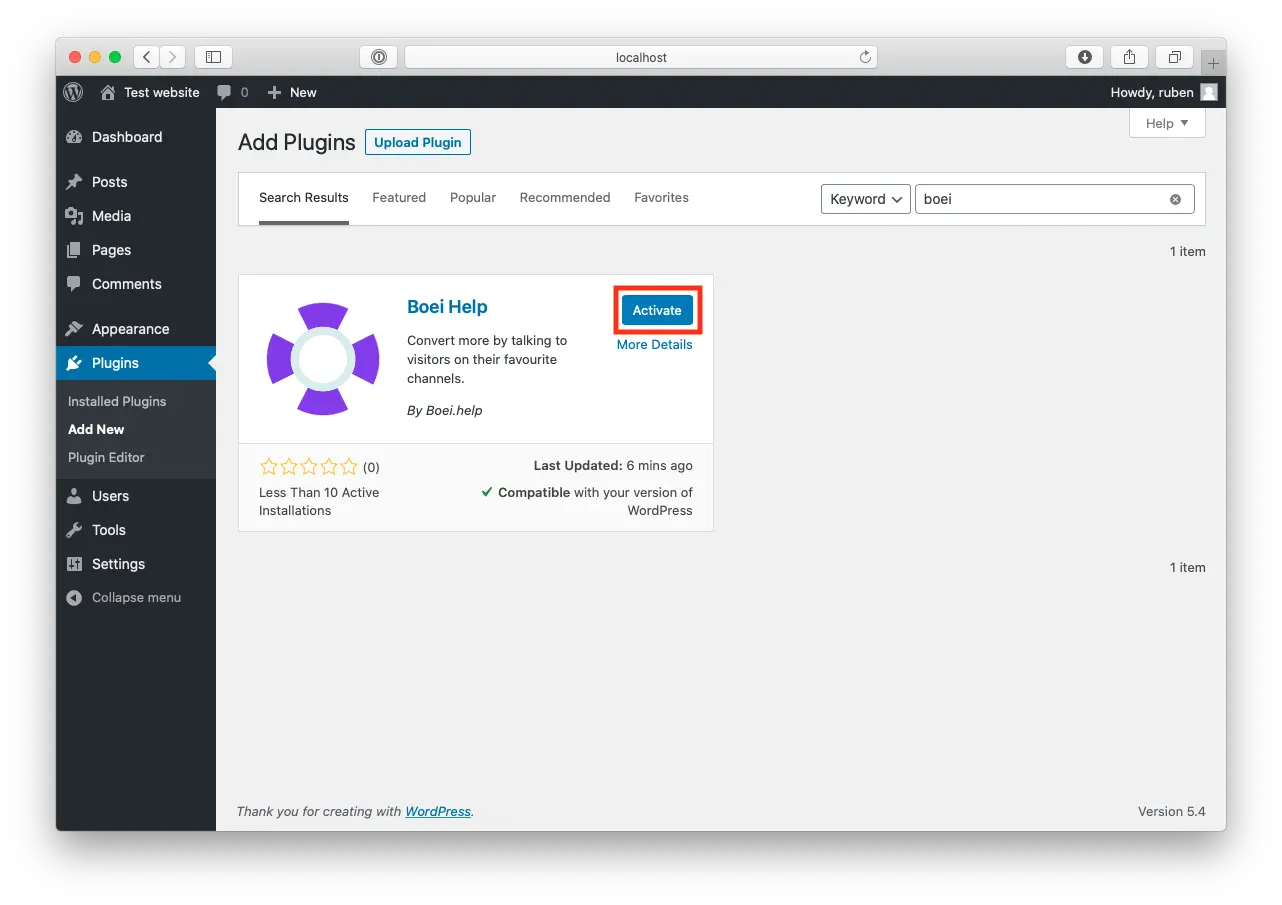
Search for "Boei" and find our plugin.
Click "Install Now".
Step 5. Activate
When the plugin is installed, press "Activate".
Step 6. Paste key in Boei's WordPress Plugin
Go to the Boei plugin in WordPress (see Boei in the left menu).
Enter the key you copied in the Widget Key field and press "save".
If you don't see the field for the Widget Key, click on "Advanced / Without domain detection".
Step 7. Finished coffee
Congrats, you are done!
Option 2 - Header and Footer plugin
1/ Grab the installation code from the Install on HTML guide.
2/ Log in to WordPress.
3/ Install the plugin: Header and Footer.
4/ Go to the configuration panel of the plugin (see Settings > Header and Footer)
5/ Under the "Header and Footer" tab (the first one), paste the Boei code (from step 1) to the section which says "Code to be added to the HEAD section of every page".
5/ Done ✅
Option 3 - Edit header file
1/ Grab the installation code from the Install on HTML guide.
2/ Log in to WordPress.
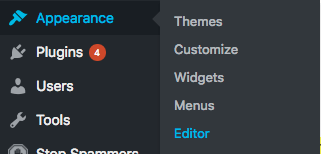
3/ Hover over – Appearance and Click Editor
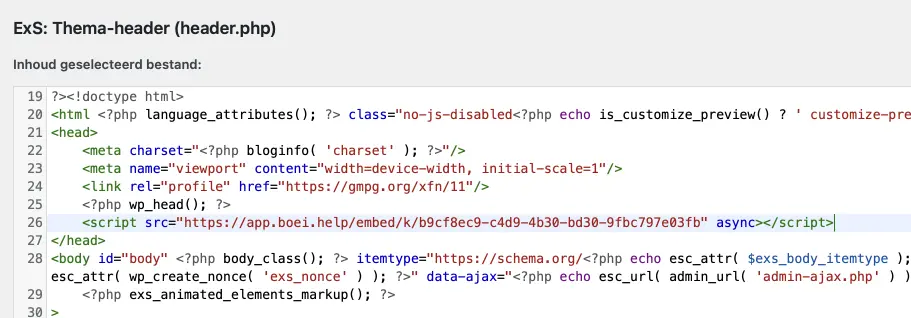
4/ Find and choose header.php file
5/ Now paste the Boei installation code (from step 1) in the WordPress editor just before You can search to find it easier.
6/ Done ✅ You can now chat with your customers or use other channels.
- Install on AdPage
- Install on Adobe Muse
- Install on carrd
- Install on Ecwid
- Install on Framer
- Install on Ghost
- Install on Google Tag Manager
- Install on HTML
- Install on Hostinger
- Install on Lightspeed
- Install on Jimdo
- Install on Joomla
- Install on JouwWeb
- Install on Phoenix
- Install on Prestashop
- Install on Shopify
- Install on Squarespace
- Install on Strato
- Install on Umbraco
- Install on Webflow
- Install on Webnode
- Install on Weebly
- Install on Wix
- Install on WordPress
- Other
