How to install Boei in your Shopify store
You can install Boei effortlessly on your Shopify store, and you won't even need a developer.
Just grab a cup of coffee ☕️, and you can do the installation in 5-mins yourself.
Step 1. Create an account
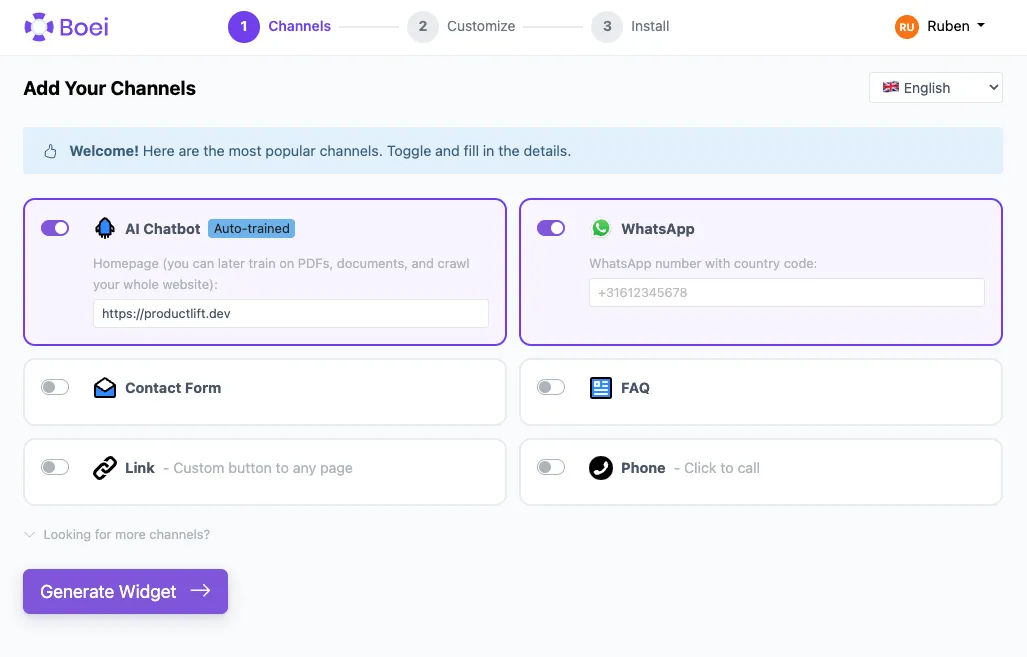
Create a Boei account if you don't have one yet. The onboarding will guide you through selecting channels, choosing a theme, and positioning your widget.
Step 2. Copy installation code
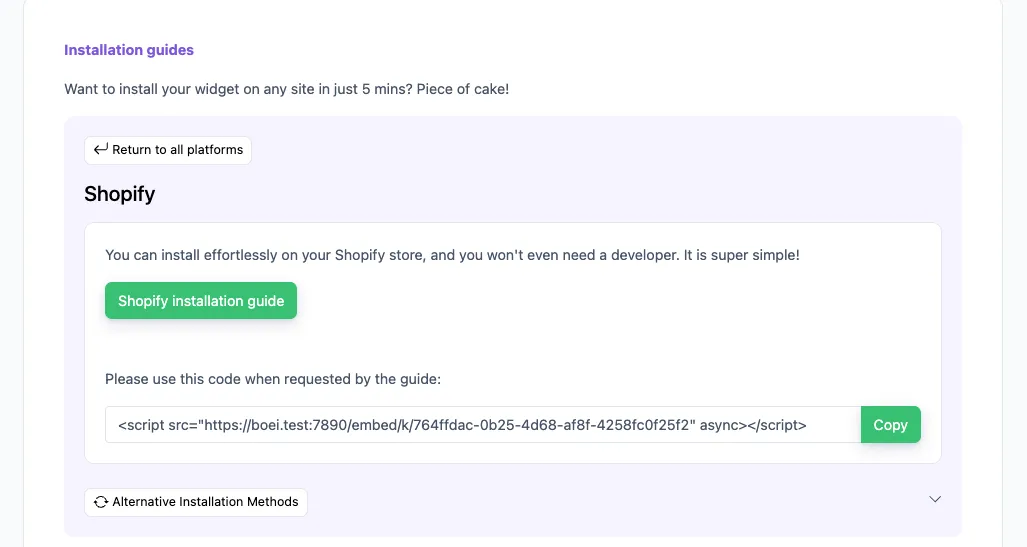
In your Boei dashboard, open your widget and click the Install tab. Select Shopify and copy the installation code.
Tip: The Install tab also offers a landing page link, QR code, and iframe embed.
Step 3. Log in to Shopify
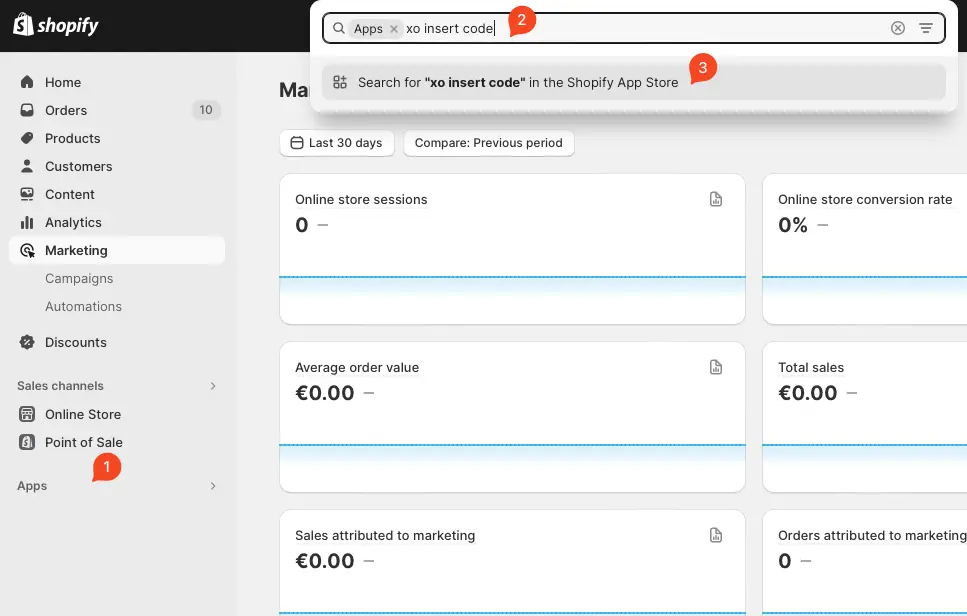
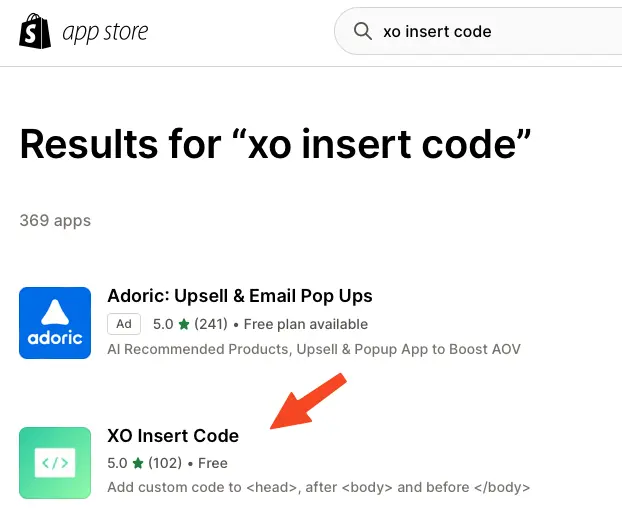
Open Shopify and click on "Apps" and search for "xo insert code".
We will use the plugin XO insert code to install Boei. It is a free and easy plugin.
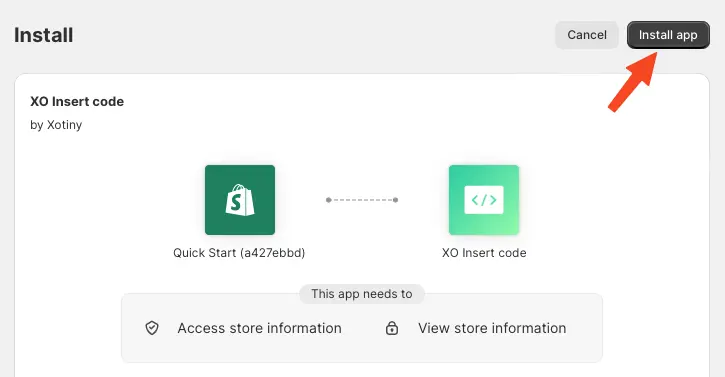
Step 4. Install the plugin
Press install.
Confirm installation in Shopify.
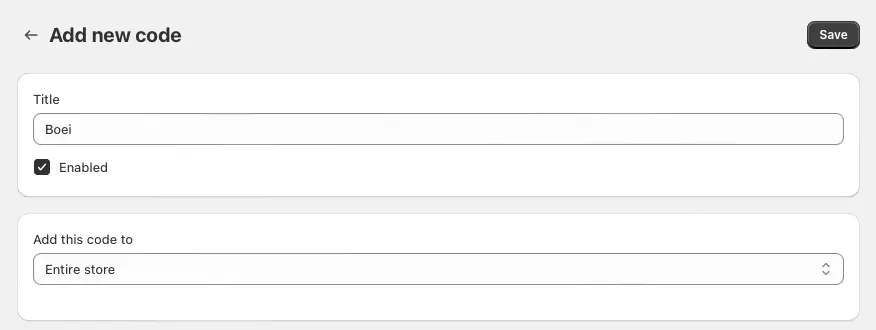
Step 5. Install the Boei code
Click add new code
Name the code "Boei" and enable it on the entire store.
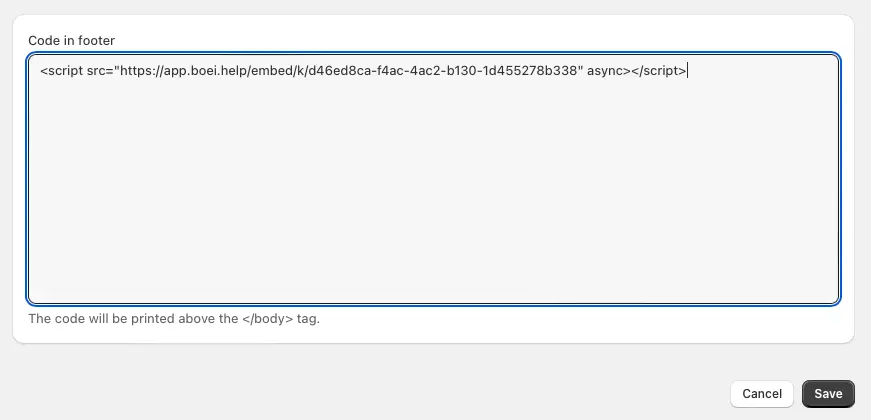
Place the script from step two in place of the "code in footer" textbox.
Press save.
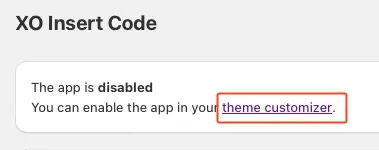
Step 6. Enable the plugin
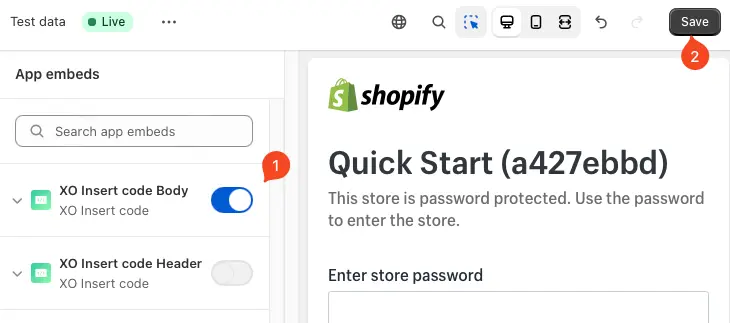
Now, we enable the plugin by clicking the theme customizer link.
Enable the checkbox and press save.
Congrats, you are done! You now have the Boei live chat Shopify installed.
- Install on AdPage
- Install on Adobe Muse
- Install on carrd
- Install on Ecwid
- Install on Framer
- Install on Ghost
- Install on Google Tag Manager
- Install on HTML
- Install on Hostinger
- Install on Lightspeed
- Install on Jimdo
- Install on Joomla
- Install on JouwWeb
- Install on Phoenix
- Install on Prestashop
- Install on Shopify
- Install on Squarespace
- Install on Strato
- Install on Umbraco
- Install on Webflow
- Install on Webnode
- Install on Weebly
- Install on Wix
- Install on WordPress
- Other
